Reference Post: Post Configuration Steps for Subordinate Certificate Authorities with CertUtil -setreg & PowerShell

Howdy!

I am by no means a PKI/Windows Certificate Authority expert at the moment but it does seem that I’m starting to go down that route as I’m working on this project to deploy a SharePoint Extranet farm out in Windows Azure. One of the requirements have us setting up and supporting our own internal Certificate Authority. As I was going through some wonderful documentation by Christopher Delay, I came across 2 environment specific errors that were really frustrating.

Environment/Tools:

1 Standalone/Offline Root CA, non-domain joined

1 Enterprise Subordinate Issuing Certificate Authority, domain joined

Both servers are Windows Server 2012 Datacenter Edition (Hosted as a Windows Azure VM)

PowerShell is used to run all commands

The Post-Configuration CertUtil commands:

Copied from Christopher Delay’s blog post:

certutil -setreg CA\CRLPublicationURLs "1:%WINDIR%\system32\CertSrv\CertEnroll\%%3%%8%%9.crl\n2:http://pki.fourthcoffee.com/certenroll/%%3%%8%%9.crl\n3:ldap:///CN=%%7%%8,CN=%%2,CN=CDP,CN=Public Key Services,CN=Services,%%6%%10"

certutil -setreg CA\CACertPublicationURLs "1:%WINDIR%\system32\CertSrv\CertEnroll\%%1_%%3%%4.crt\n2:http://pki.fourthcoffee.com/certenroll/%%1_%%3%%4.crt\n3:ldap:///CN=%%7,CN=AIA,CN=Public Key Services,CN=Services,%%6%%11"

certutil -setreg CA\CRLPeriodUnits 3
certutil -setreg CA\CRLPeriod "Days"
certutil -setreg CA\CRLOverlapPeriodUnits 3
certutil -setreg CA\CRLOverlapPeriod "Days"
certutil -setreg CA\CRLDeltaPeriodUnits 0
certutil -setreg ca\ValidityPeriodUnits 5
certutil -setreg ca\ValidityPeriod "Years"
certutil -setreg CA\AuditFilter 127

net stop certsvc
net start certsvc

certutil –CRL

Assuming you update the CertEnroll URLs to match your environment, you may get the following error after you complete the CertUtil -CRL command in PowerShell.

Certutil -CRL
CertUtil: -CRL command FAILED: 0x8007010b (WIN32/HTTP: 267)
CertUtil: The directory name is invalid.

In troubleshooting, I tried to replace all of the variables (%3, %1, etc.) with hard-coded values which worked just fine, but deep down, I knew that that wasn’t the way to go. I eventually switched over to the old school cmd prompt with the same commands to test with and received a different error:


Certutil -CRL
CertUtil: -CRL command FAILED: 0x8007208f (WIN32: 8335)
CertUtil: The object name has bad syntax.

That error message led me to this TechNet forum post which mentions that the extra % sign in front of each variable is actually designed to be used with batch files. So I modified the commands to exclude the extra % sign in front of each variable and voila, it works! Now back to trying it in PowerShell…

Unfortunately, I was still getting the same “The directory name is invalid” error when I try to run the CertUtil -CRL command. Upon investigating the Event Viewer logs, I see a related error that says:

“Active Directory Certificate Services could not publish a Base CRL for key 0 to the following location: WINDIR\system32\CertSrv\CertEnroll\Azure Extranet Issuing Authority 1.crl.  The directory name is invalid. 0x8007010b (WIN32/HTTP: 267).”

Hmmm! That’s weird… PowerShell doesn’t seem to be parsing %WINDIR%! Quick search yields a forum post that says we have to use $env:windir instead of %WINDIR% when using PowerShell. Bada-bing, bada-boom. And the fat lady sings…

Complete updated script for when you are using PowerShell to run the post configuration steps for an Enterprise Subordinate Issuing Certificate Authority:


certutil -setreg CA\CRLPublicationURLs "1:$env:windir\system32\CertSrv\CertEnroll\%3%8%9.crl\n2:http://pki.SubCA.local/certenroll/%3%8%9.crl\n3:ldap:///CN=%7%8,CN=%2,CN=CDP,CN=Public Key Services,CN=Services,%6%10"

certutil -setreg CA\CACertPublicationURLs "1:$env:windir\system32\CertSrv\CertEnroll\%1_%3%%4.crt\n2:http://pki.SubCA.local/certenroll/%1_%3%4.crt\n3:ldap:///CN=%7,CN=AIA,CN=Public Key Services,CN=Services,%6%11"

certutil -setreg CA\CRLPeriodUnits 3
certutil -setreg CA\CRLPeriod "Days"
certutil -setreg CA\CRLOverlapUnits 3
certutil -setreg CA\CRLOverlapPeriod "Days"
certutil -setreg CA\CRLDeltaPeriodUnits 0
certutil -setreg ca\ValidityPeriodUnits 5
certutil -setreg ca\ValidityPeriod "Years"
certutil -setreg CA\AuditFilter 127
Net stop certsvc
Net start certsvc
Certutil -CRL
Windows Azure VM Network Latency Analysis

I’ve finally succumbed to the awesomeness that is cloud computing and have fallen in love with the possibilities of spinning up virtual machines at a moments notice. Can you imagine that? In minutes, you can practically host a virtual machine any where in the world!

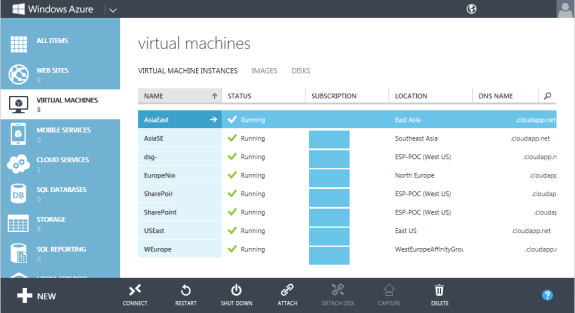
azuredashboard

Being a SharePoint guy, I thought, “Whoa, cool! Does that mean I can geo-distribute my WFEs around the globe to better serve my end-users around the world?” Unfortunately, the answer is no… Although stretched farms are supported, there are 2 support requirements documented by Microsoft:

1. Latency between your web front ends and database servers must prove to average < 1 millisecond over a ten-minute period.

2. Bandwidth between your datacenters must be at least 1 gigabit per second.

Given that we haven’t been able to bend the laws of physics just yet, meeting these numbers prove to be a task that isn’t quite possible at the moment. So my dreams of having a geo-distributed SharePoint collaboration farm were crushed leaving me with a centralized farm to ponder about. But where in the world should this centralized farm be hosted?

Ping… ping… ping…tcping!

If you’ve been working with Azure then you probably already knew this, but if you didn’t, you’ll probably come to a day when you’re trying to ping various public websites only to receive “Request timed out” messages.

Ping

Does the internet not exist in the cloud? Yes it does, except the Azure team decided that it’s best to not enable certain types of traffic like outbound ping and tracert for various security reasons. Funny thing is, you can still ping bing.com though 🙂

A little bit of searching led me to a post by Rob Blackwell that describes using Eli Fulkerson’s tcping instead. Also inspired by Rob’s post, I was able to use tcping to record latency metrics (in milliseconds) between each of the Azure datacenters as well as from my office location in Aliso Viejo, CA.

LatencyChart


The process I used was this:

1. Created a Small VM using the SharePoint template in each Azure datacenter. I used the SharePoint VM image because it already has IIS set up so I don’t have to fudge with setting up a default website to test. Also of note was the inability to create VMs in the US-North and US-South datacenters. I guess they don’t support VMs there.

2. Configured public/private endpoints for port 80 on each VM.

3. Logged onto each VM and ran tcping 20 times against each site including one hosted in my local office’s datacenter. Example:

tcping.exe -n 20 hostname > C:\AzureLatency\USWest-USEast.txt

4. Logged all the data in Excel for analysis.

Although this data isn’t going to be entirely representative of what the end users will experience, it gives us the ability to ball park the level of experience that users around the globe can expect in terms of latency. And if I’m not interpreting this data incorrectly, it looks like the US West datacenter will provide the best overall experience to a global set of end-users based on having the combination of lowest latency average to other geo-locations, lowest standard deviation of latency between the geo-locations and lowest maximum latency that was experienced during my testing.

So there you have it. Go west!

The Courage to Lead – #NonSharePointRelated

I rarely ever post anything non-SharePoint related to this blog but this is a special occasion :). I was working on an essay for a PMP class that I’m taking and really got into a writing groove so I thought it’d be nice to post instead of stowing it away in a document somewhere never to be looked at again. Perhaps this essay would be beneficial to someone out there, plus it’ll make it easier for me to reflect upon later in life. The gist of the assignment is to write about leadership qualities I admire and to share the experiences of how those qualities became influential to me.

#StartEssay

Ah, yes… leadership comes in many forms and is often praised yet it seems like so few have the courage to display the courage to lead. Although leadership styles have evolved over the years in both the workplace and in our everyday lives, there are 5 leadership qualities and styles that have stuck out in my mind – effective story-telling, perseverance, laissez-faire-ness, ruthlessness and compassion.

Effective story-telling by those gifted with the ability to speak well, clearly and succinctly have always inspired me in more ways than one. As a youth, I was quite shy and didn’t speak much but when I saw others that could speak well, they were often seemingly successful and in positions of leadership representing companies, products or themselves. Seeing these leaders of speech inspired me to “break out of my shell,” motivated me to read about effective public speaking and, eventually, even afforded me the opportunity to speak at various technology users’ groups and conferences with courage.

Perseverance was a word that I vividly remember learning in the 3rd grade. I don’t remember the details of the story, but it was a children’s book that chronicled the trials and tribulations of a character named Daniel. That’s all I remember about the story, but the moral of the story stuck with me nonetheless. The ideas of perseverance continued to permeate my youth as I experienced bouts of failure and overcame them by using the displays of perseverance from professional athletes to inspire and motivate me to get back up and try again and again until I was fully satisfied with my results. These role models ranged from basketball players like Michael Jordan who played through the flu in the ’97 playoffs, to Olympians training for years to be able to compete on the world stage, to Ironman Triathletes that I watched on TV once a year push their bodies to traverse 140.6 miles worth of distance swimming, biking and running all within 16 hours. These role models taught me that no goal is unobtainable with the right amount of mental courage.

I’m not sure when or how the laissez-faire, a term coined in 16th century France, leadership style entered our corporate culture but I have definitely been a happy beneficiary of it. Earlier in my career, I had the privilege of working with an executive team and manager that was very much hands-off and entrusted me to do what was right with little oversight. Only in retrospect did I realize that this management style suited me extremely well because I was, and still am, very self-motivated and enjoyed the freedom to execute on high-level strategies that required little to no oversight. This gave me the courage to feel like a valued professional, to make decisions professionally and in turn I conducted myself with others like a professional. I’m grateful that I still work in an environment that promotes this type of leadership.

Ruthlessness doesn’t sound like a nice word but when it comes down to business everyone needs a little bit of ruthlessness. Most businesses are in the business of making money and with more money, come more challenging scenarios that call for tough decisions. Jack Welch did this, as CEO of GE, by promoting and rewarding those that are ranked in the top 20% of employees and fired the bottom 10% of employees ranked in their performance management system. In using this system, he was able to increase the company’s worth by 4000% during his 20-year career. Jack Welch’s leadership style taught me that in order to obtain results and affect change; one has to have the courage to do so with a certain amount of
ruthlessness and perhaps fearlessness.

And alas, we come to the leadership trait of compassion. I must say that with the ruthlessness that I learned from Jack Welch, the ability to have compassion has proven to be even more important and effective in leading others. Before I met my wife, I was a gung-ho, enterprising millennial willing to go to any length to become more successful. I didn’t care how ruthless I was to myself or others, as long as it benefitted me and my career. Sure, I was able to call myself successful but I also worked long hours and stepped on anyone who I thought was not worthy of their title. In doing so I burned many bridges along the way. My wife taught me otherwise. She showed me how to be compassionate, not only feign compassion, and that gave me the courage to slow down and build meaningful relationships with others, both in and out of the workplace. This, I’m sure, will help me become a successful leader in the long run.

As you probably noticed, there was a general theme to the leadership qualities I described. Most people are not born leaders. Leadership tends to be a collection of traits that are learned throughout one’s life. But in order to learn these traits, one has to have the courage to learn them. One has to have the courage to be receptive to change and guidance from others while maintaining the courage and faith to do what you know is right. I’ve found the courage to lead by learning how to effectively tell stories; to persevere against adversity through mental toughness; to trust your peers and employees with their abilities; by being ruthless in moderation and most importantly of all; I make sure to sprinkle on some compassion in all of my actions that involve others. Keep calm and lead on. Cheers!

#EndEssay

SharePoint Designer 2010 can access some sites but not others in the same Site Collection

This one got me good… real good… I couldn’t find any documented fixes for this issue so here it goes!

Scenario
You have a SharePoint 2010 farm that was migrated from SharePoint 2007. You have end users that would like to use SharePoint Designer to create some workflows but when trying to access the site they get the error message that says “This web site has been configured to disallow editing with SharePoint Designer.”

SharePoint Designer Not Allowed

You’re thinking to yourself, this is easy cheesy. So you go to Central Administration and turn on/enable SharePoint Designer. But wait… it’s already enabled… OK, let’s go check the Site Collection settings. Oh shoot, those are all enabled too… You try to open another site in the same Site Collection with SharePoint Designer and that works! But it’s not the one you want… You sit there scratching your head for 21.3 seconds and then decide to do some googling and here you are. 🙂

Root Cause
As briefly alluded to earlier, this is most likely a result of a SharePoint 2007 to SharePoint 2010 migration in which the SharePoint 2007 sites had blocked SharePoint Designer access by editing the site templates’ ONET.xml files. During the migration, you had forgotten about this tweak and the settings made aren’t transferred to the new servers (at least not for the XML definition files anyways). But unbeknownst to you, this change caused some entries to be made in the SPWeb’s property bag that did come along for the ride. Dun, dun, dun….

Solution
Thanks to a hint from Ethand from the SharePoint forums we can fix this issue with some nifty PowerShell. If you’re a SharePoint Manager fan, you can validate that the offending property exists by navigating to the properties node of the SPWeb and then finding the property name “vti_disablewebdesignfeatures2”.

vti_disablewebdesignfeatures2

As expected, this property has a value of “wdfopensite” which is the trigger to not allow SharePoint Designer to connect to this site. I was hoping to be able to modify this value via SharePoint Manager, but it looked like a read-only property here so let’s shuffle our way over to PowerShell to do some real damage…er, I mean some problem resolution.

PowerShell

$web = get-spweb "http://URLToYourOffendingWebSite"
$web.allproperties["vti_disablewebdesignfeatures2"] = ""
$web.update()

After the update, you can validate by either calling the property again in PowerShell or viewing it in SharePoint Manager to confirm that the property now contains an empty value. Go back to SharePoint Designer (you may need to close it and re-open) and ta da! You’re back in business and all is well again.

1 Million Views & Counting! Thank you SharePoint Community!

Boy, what a ride it has been! Can you believe this blog has crossed the 1 million views mark? It all started at the end of 2006, right around the beginning of the SharePoint/Office 2007 product cycles. After spending countless hours in newsgroups & SharePoint forums like MSDN and Tek-Tips giving and receiving help from others, I was inspired to set out with a New Year’s resolution in 2007 to start a blog of my own!

I must admit, those first couple months were pretty rough with the view stats and even made me question whether or not it was even worth writing this stuff! Luckily, I was able to look at it like an online notepad of my own, to record my own SharePoint findings to be referenced later on.  I was eventually spirited by some awesome questions and comments from all around the world and it was this thrill of being able to help others, regardless of what time zone they’re in, regardless of what language they spoke, that helped to define not only this blog but also myself and my role in the community.

If anyone needs a good reason to start a blog, I can definitely say that it has opened a tremendous number of opportunities for me through the years. It has not only helped to improve my writing, vocabulary and communication skills, but it has also enabled me to work with awesome companies, meet awesome people, speak at user groups, conferences, and even exposed me to world of authoring real books! So if you can bare the time to put your thoughts down in a blog, I’d highly recommend it. As long as you genuinely contribute to the community, the community will be genuinely generous to you.

But alas, all good things must come to an end right? No, I’m not giving up on SharePoint and I won’t stop contributing. But with the emergence of such great blogging communities like NBSP, the thriving MSDN forums and countless other SharePoint bloggers out there coupled with a slight shift in my own career priorities, the number of posts I put out will definitely be impacted. So with that said, I’ll leave you with some interesting stats about my blog below and see you when I see you!

Blog Started: January 2007

Blogging Platform: WordPress.com

Number of Posts: 141

Number of Comments: 1212

Top 5 Posts of All-Time:

1. How to move/migrate SharePoint list items/documents and preserve metadata properties at the same time : 254,433 (Accounts for about 25% of all views!)

2. How to Create Custom SharePoint 2010 Page Layouts using SharePoint Designer 2010 : 128,573

3. Importing User pictures from Active Directory to MOSS 2007 : 69,034

4. How to edit the form fields of a SharePoint List : 56,397

5. Alternate Access Mapping in SharePoint : 53,034

Total Ad Revenue: $108.86 – Was ad free until earlier this year. Click on those ads people!!!! 🙂

blog-millionviews

blog stats

InfoPath: Concatenating values of a repeating group from secondary XML datasource

This was, by far, one of the most retarded [respectfully redacted per offended reader’s request] painful (perhaps self-inflicted) things I have ever encountered in trying to work with InfoPath. Yes, there are quite a few posts on how to do what I was trying to do, but for some reason, none of them really resonated until I came across this post on MSDN. I don’t think I was able to find an exact description of what’s going on here, so I’ll do my best to document.

Scenario

I have an InfoPath 2010 form that’s using an external data source (XML file stored in SharePoint). The repeating data structure looks like this:

Level 1 Level 2 Level 3
Users    
  User  
    Customer Name
    Email

With that information, I’m trying to concatenate each instance of Email from each user into one string. Now, the commonly recommended formula for this type of action is this:

xdMath:Eval(xdMath:Eval(../my:RepeatingGroup, ‘concat(my:ValueField, “;”)’), “..”)

The Problem

The problem with this formula in my case, is that for some reason, the value being returned would only show the concatenated value of the first node for the N number of nodes in the data source. For example, if my first email address is john.doe@email.com and I had 10 other unique email addresses to concatenate, the result of the formula would look like this:

john.doe@email.com; john.doe@email.com; … etc. 10 times.

Solution

So after some days of head-banging and almost resorting to a code-based solution, the following formula fell out of the sky and works as expected:

xdMath:Eval(xdMath:Eval(xdXDocument:GetDOM(“NotificationRecipients”)/Users/User, ‘concat(Email, “;”)’), “..”)

The thing to note here is the Email field in the concatenation function. One would think you should use the “Insert Field or Group…” button to insert the field, right? Or at least have a path to the value or something…? Wrong… No pathing necessary and in fact, any pathing you put in here won’t even work. Well, it didn’t work for me… Just use the straight-up string literal node name.

The end.

SharePoint Admin Helper: How to find sites with Request Access Email set to a specific email address #PowerShell

Did you know the email addresses that you configure for the Request Access functionality becomes a black hole if that employee is terminated? Unfortunately, SharePoint doesn’t know how to update this setting by itself, forcing SharePoint Admins and Site Owners to hunt down sites that have this setting activated in order to update it. The script I wrote below should help SharePoint Admins with the task of identifying where this feature is configured based on the email address that needs to get updated. It doesn’t automatically update the property for you as well but that’s easily done by creating another variable to hold the address that should be used and then assigning that variable to the property within the IF statement that outputs when the site is found. Hopefully it’ll help some of you out there. Cheers 🙂

# This script will identify sites that have the Request Access email property set to the variable. 
#
# Author: Henry Ong

######################## Start Variables ########################
$siteURL = "https://site" #URL to any site in the web application.
$emailAddressToFind = "email@email.com"
######################## End Variables ########################

[System.Reflection.Assembly]::LoadWithPartialName("Microsoft.SharePoint")

$site = new-object microsoft.sharepoint.spsite($siteURL)
$webApp = $site.webapplication
$allSites = $webApp.sites

foreach ($site in $allSites)
{
	$allWebs = $site.AllWebs

	foreach ($web in $allWebs)
	{
		if($web.RequestAccessEnabled -eq $true)
		{
			Write-Host "Evaluating " $web.URL
			if($web.RequestAccessEmail -contains $emailAddressToFind)
			{
				Write-Host "Found " $emailAddressToFind " @ " $web.URL -ForegroundColor Green
				Write-Host "Press any key to continue..."
				$x = $host.UI.RawUI.ReadKey("NoEcho,IncludeKeyDown")
			}
		}

		$web.Dispose()
	}
	$site.dispose()
}

write-host "Done"

Auto-Restarting Forefront for SharePoint when it hangs and times out with PowerShell

Scenario

Every once in a while I would have the Forefront Antivirus for SharePoint engine on 1 of my 3 WFE’s conk out. When this happens, SharePoint is fully functional via that WFE except for file uploads which would cause users to experience an error message. This error would prevent the users from uploading any files via that WFE.

Error Messages

The end users uploading the files may experience the following error message:

“The installed virus scanner is currently unavailable. If the problem persists, contact your administrator.”

The Event Viewer Logs may show:

1719104822: #960013: Antivirus scanner timed out.

The SharePoint service is running but the Forefront VSAPI Library is not registered.

Manual Solution

The manual solution is to perform the procedure as described here by Ingo Karstein.

My Automated Solution

At first, I thought it would be a good idea to leverage my existing Diagnostics Log Monitoring script to check for the error messages. But after testing it out, I realized that the error entries would only be logged after a user had unsuccessfully tried to upload a document. After pondering for a bit, I wanted a way to prevent users from getting their uploads denied in the first place. So I ended up creating another script that auto-uploads a 1KB test document from each WFE and assumes that any upload error would have been caused by a hung Forefront service. The following PowerShell script was placed on each WFE and runs on a 5-minute interval. Upon an upload exception, it will disable the antivirus settings in Central Administration, restart the appropriate Windows Services, and then reinstate the Central Admin settings all with minimal service interruption. In testing, this automated process took between 5-10 seconds to run upon identification of an error. No IIS resets are performed during this process so the end-users wouldn’t even know that anything’s going on unless they happen to be trying to upload something right after Forefront hangs and  before the automated job runs every 5 minutes.

PowerShell Script

############# Start Variables ################
$uploadSite = "https://SharePointSite/"
$documentLibName = "Documents"
$testFile = "D:\Temp\TestUpload.txt"
$emailFrom = fromEmail
$emailTo = @("yourEmail")
$subject = "Forefront Failure; Auto-Kick Start Initiated"
$body = "Server: " + $env:COMPUTERNAME
$smtpserver = "yourSMTPServer"
$foreFrontDirectory = "C:\Program Files\Microsoft Forefront Protection for SharePoint\"
############# End Variables ##################

####### Start create test file if it doesn't exist
if(!(Test-Path -Path $testFile))
{
new-item -Path $testFile -Value "." –itemtype file
}
####### End create test file if it doesn't exist

[System.Reflection.Assembly]::LoadWithPartialName("Microsoft.SharePoint")
$site = New-Object microsoft.sharepoint.spsite($uploadSite)
$web = $site.openweb()
$library = $web.GetFolder($documentLibName)

$filestream = ([System.IO.FileInfo] (Get-Item $testFile)).openread()
$bytes = new-object byte[] $filestream.length
$filestream.read($bytes, 0, $filestream.length)
$filestream.close()
$folderPath = $library.URL + "/AutomatedTestUpload - $env:COMPUTERNAME.txt"

try
{
$library.files.add($folderPath, $bytes, $true)
}
catch [Exception]
{
$CAService = [Microsoft.SharePoint.Administration.SPWebService]::ContentService
$CAService.AntivirusSettings.UploadScanEnabled = $false
$CAService.AntivirusSettings.CleaningEnabled = $false
$CAService.Update()

Stop-Service -Displayname "Microsoft Forefront Server Protection Controller"
Stop-Service -DisplayName "Microsoft Forefront Server Protection Controller for SharePoint"
& ($foreFrontDirectory + "fsccontroller.exe") " /disable"
& ($foreFrontDirectory + "fsccontroller.exe") " /enable"

Restart-Service -DisplayName "SharePoint 2010 Administration"
Restart-Service -DisplayName "SharePoint 2010 Timer"

 Start-Service -DisplayName "Microsoft Forefront Server Protection Controller for SharePoint"
Start-Service -Displayname "Microsoft Forefront Server Protection Controller"

$CAService.AntivirusSettings.UploadScanEnabled = $true
$CAService.AntivirusSettings.CleaningEnabled = $true
$CAService.Update()

  Send-MailMessage -To $emailTo -Subject "Forefront Antivirus Auto-Kicked" -Body $body -SmtpServer $smtpserver -From $emailFrom -BodyAsHtml
}

$web.dispose()
$site.dispose()

Helpful Resources

http://ikarstein.wordpress.com/2010/12/07/forefront-protection-2010-for-sharepointerror-the-sharepoint-service-is-running-but-the-forefront-vsapi-library-is-not-registered/

http://ystex.net/2010/12/12/powershell-fun-setting-sharepoint-antivirus-settings/

Security Trimming InfoPath fields with SharePoint 2010 InfoPath Forms Services Based on SharePoint User Groups & Claims-Based Authentication

Yes, I know variations of this topic have been blogged about quite a few times but I couldn’t find one that fit my particular use case and environment variables. Also, it was difficult for me to find a clear and concise guide in setting this up so hopefully this write-up will help you achieve what I’m about to show you in as few steps as necessary. But first of all, I should give props to the following blogs and links for giving me a head start and some food for thought:

http://blog.symprogress.com/2011/05/infopath-list-form-hidedisable-fields-based-on-sharepoint-group-membership/

http://www.projectpoint.at/?p=97

http://gordonduthie.net/2011/01/26/sharepoint-2010-claims-based-security-infopath-data-connections-and-getuserprofilebyname/

http://msdn.microsoft.com/en-us/library/dd946988%28office.12%29.aspx

My Scenario & Environment

Using browser enabled InfoPath 2010 forms, I have a need to hide and/or disable certain fields from users based on their SharePoint group membership. The form is used to track change requests and its status. The only noteworthy thing about my farm is that it is utilizing Claims-Based Authentication throughout.

Step 1 – Design your form

Design your browser based form as desired and then publish it to a SharePoint Form Library. Instructions on how to do that can be found here. Everything render ok? Cool, move on to Step 2.

Step 2 – Add Data Connections

Since we’d like to leverage SharePoint’s out of the box web services to figure out if the current user is in a particular group, we’ll want to add a Data Connection to https://YourSharePointSiteCollection/_vti_bin/usergroup.asmx. The method we’re interested in using is GetGroupCollectionFromUser.

Step 3 – Modify the Schema Files

I’m borrowing this step from Daniel Laksana’s blog post (Steps 3 & 4). To recap:

I. Publish > Export the source files

II. Below

<s:import namespace="http://www.w3.org/2001/XMLSchema"></s:import>

You’ll want to copy paste the following:

<s:complexType name="GetGroupCollectionFromUserType">
    <s:sequence>
      <s:element minOccurs="0" maxOccurs="1" name="userLoginName" type="s:string"/>
      <s:element minOccurs="0" maxOccurs="1" name="Groups">
        <s:complexType>
          <s:sequence>
            <s:element maxOccurs="unbounded" name="Group" >
              <s:complexType>
                <s:attribute name="ID" type="s:unsignedShort"></s:attribute>
                <s:attribute name="Name" type="s:string"></s:attribute>
                <s:attribute name="Description" type="s:string"></s:attribute>
                <s:attribute name="OwnerID" type="s:unsignedByte"></s:attribute>
                <s:attribute name="OwnerIsUser" type="s:string"></s:attribute>
              </s:complexType>
            </s:element>
          </s:sequence>
        </s:complexType>
      </s:element>
    </s:sequence>
  </s:complexType>

III. Find this:

<s:element name="GetGroupCollectionFromUser">
   <s:complexType>
     <s:sequence>
       <s:element minOccurs="0" maxOccurs="1" name="userLoginName" type="s:string">
         </s:element>
    </s:sequence>
  </s:complexType>
</s:element>

and replace it with this:

<s:element name="GetGroupCollectionFromUser" type="tns:GetGroupCollectionFromUserType">
</s:element>

Save your changes.

Step 4 – Getting a list of the SharePoint groups that the current user belongs to

We can do this with a Form Load action. I’ve named this rule “GetUserGroups”.

Let’s now zoom into the actions that this rule will perform:

Action 1: Set the userLoginName query field with the value of the current user’s username.

Action 2: Query for data.

Step 5 – Manage rules for a field that should be disabled for certain users

In my example, we are going to disable the Request Status drop down for users that are not in the “Request Queues Owners” SharePoint group. To do so, we’ll create a rule on that field by left clicking on it and then the related rules will show up in the Rules pane. If the Rules pane is not currently open, then you’ll want to right-click on the form field and then select Rules > Manage Rules… from the drop down.

Since the data connection in our previous step brings back all of the groups that the current user is a member of, we’ll want to configure the rule to tell us if any of those groups match a predefined SharePoint group that would be able to update the field. Otherwise, the field would be disabled/read-only. Let’s configure this rule like so:

Step 6 – Publish to SharePoint & Test

We’re now ready to publish the form back out to the SharePoint Form Library and test the security trimming! If you don’t have two accounts to test with, you should be able to test with a single account by adding and removing yourself into/out of the preconfigured SharePoint group that’s being referenced within the previously configured formatting rule.

That’s all folks! Enjoy 🙂